• Home
  • Contact

Period Productions

Variety Entertainments, Historical Presentations, Unique Craftsmanship

  • Home
  • Contact

How Weapons Get Names

There are many stories about weapons with names, Authur’s sword, various Japanese katana, video game weapons (BFG). How does this happen? Well a year ago, at the renaissance festival where I demonstrate bow making, I have several on display. English longbows and horse bows. A patron asked about the maker of the horse bows. The maker was a man named Atilla and I have several of his bows. The patron informed me that Atilla closed up his shop and moved back to Hungary. The last few years had killed his business. Seems these bows are now prized. I will miss Atilla and his work. While this conversation is going on, another member of the militia (who is an old friend and real jerk) made the offhand comment I should make my own. This challenge sunk in, and so now I introduce Rippington!

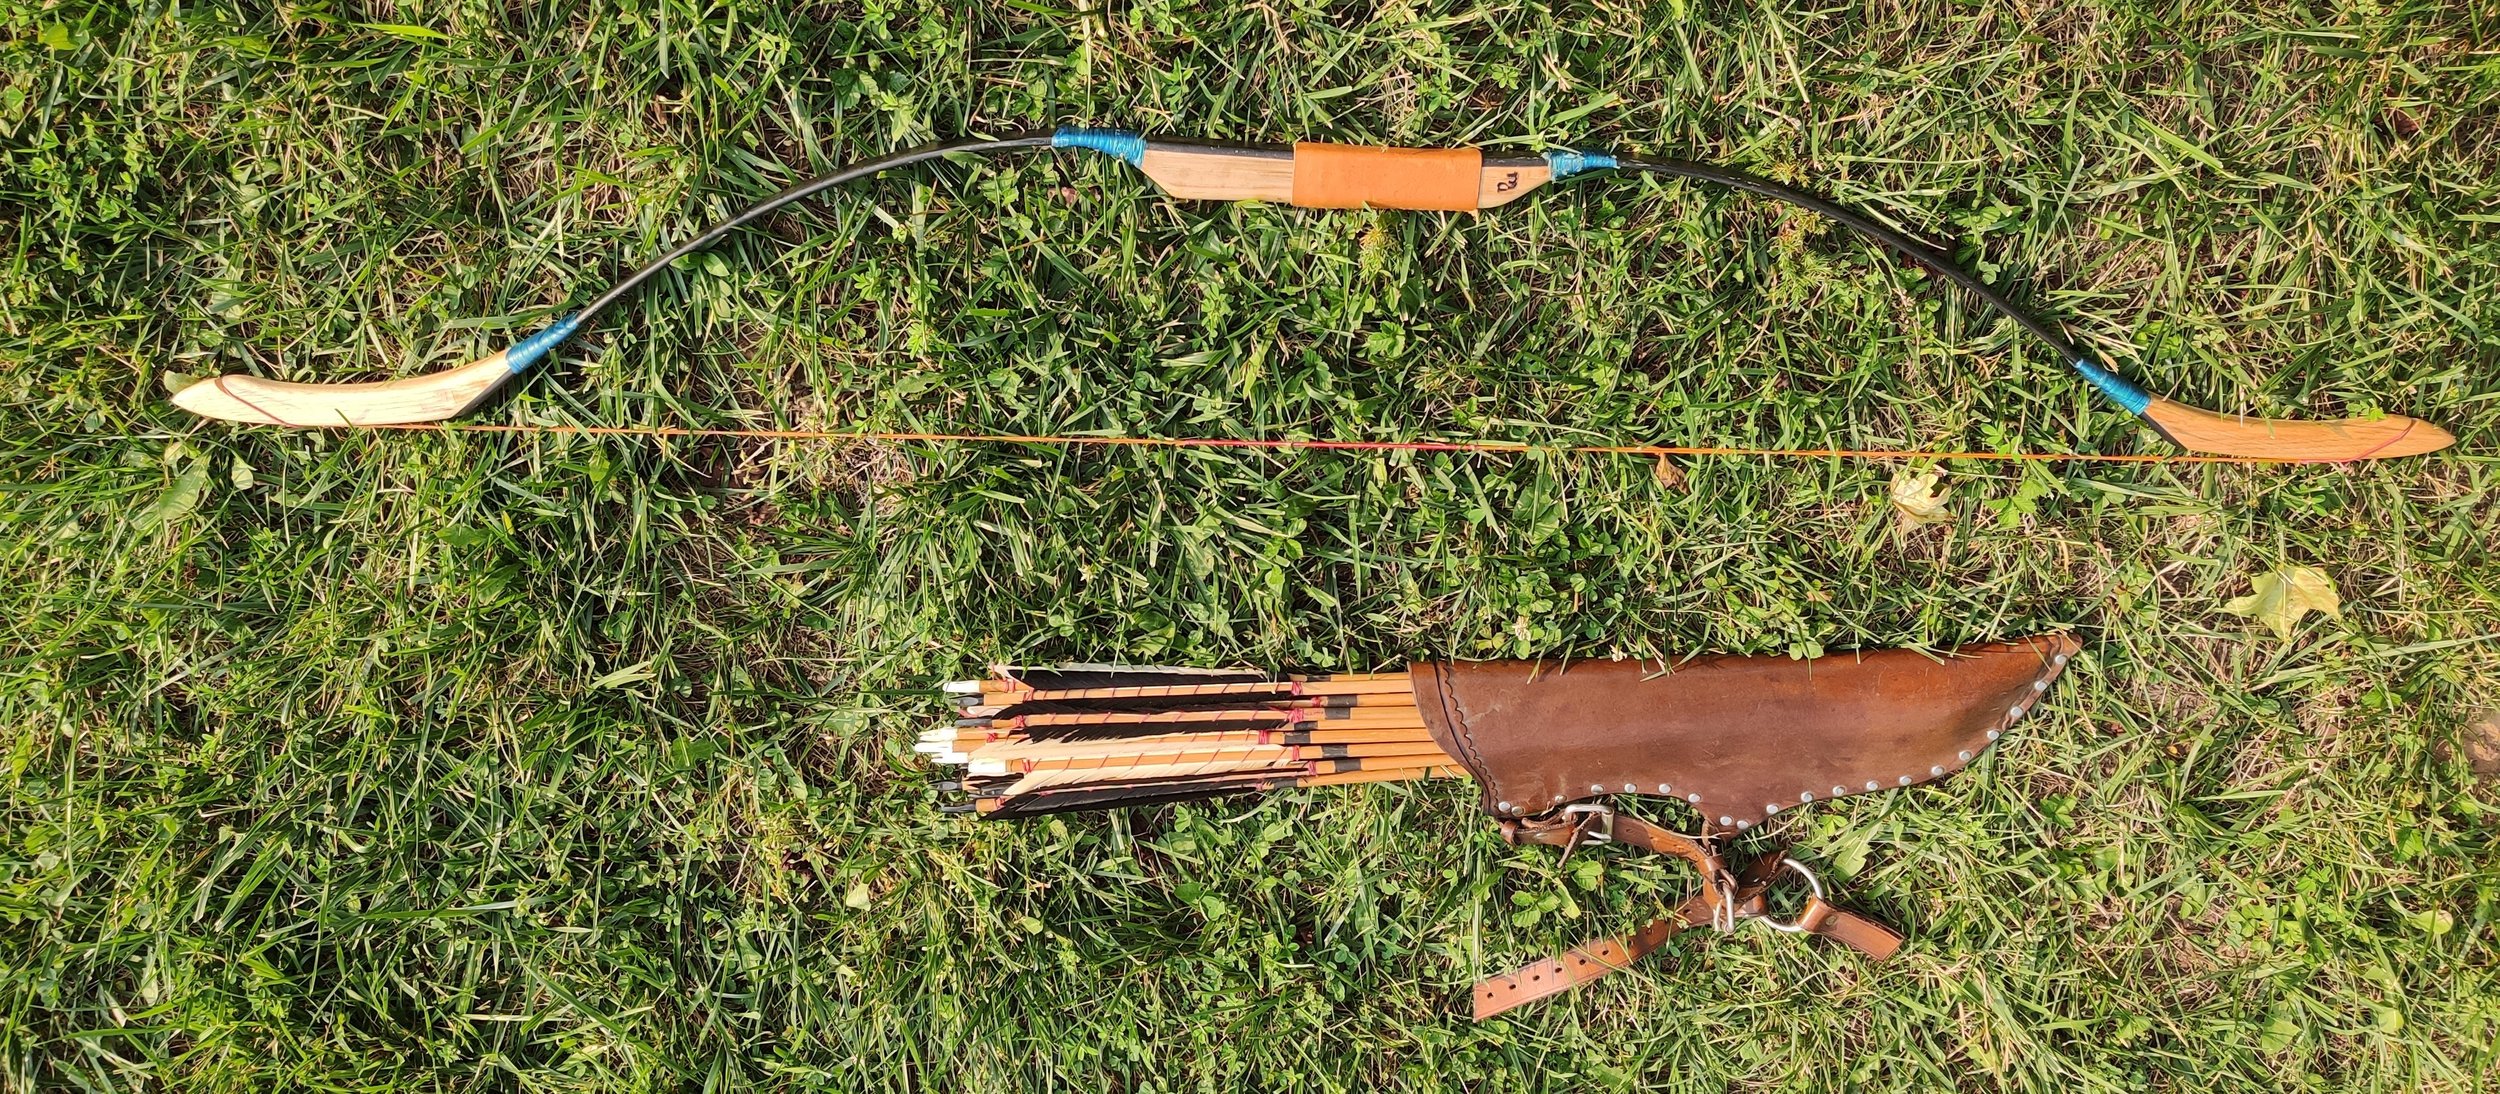
Here is Rippington, ready for action!

A traditional horse bow was made of horn from water buffalo, wood or bone, sinew, and hide glue. This is a kit from www.bowskin.com. The kit is $140.00 US. It comes with a carbon fiber/fiberglass core, to ends (syahs), a handle, super sinew, 2 sets of 2 part Fasco Epoxy glue, a string, and some instructions. The instructions are a bit sparse, so I have built this blog for more details.

The hard parts

Prepping for glue up

This is my bow bench in my shop. I have a vise held in the side vise of my woodworking bench and a stand held in my end vise.

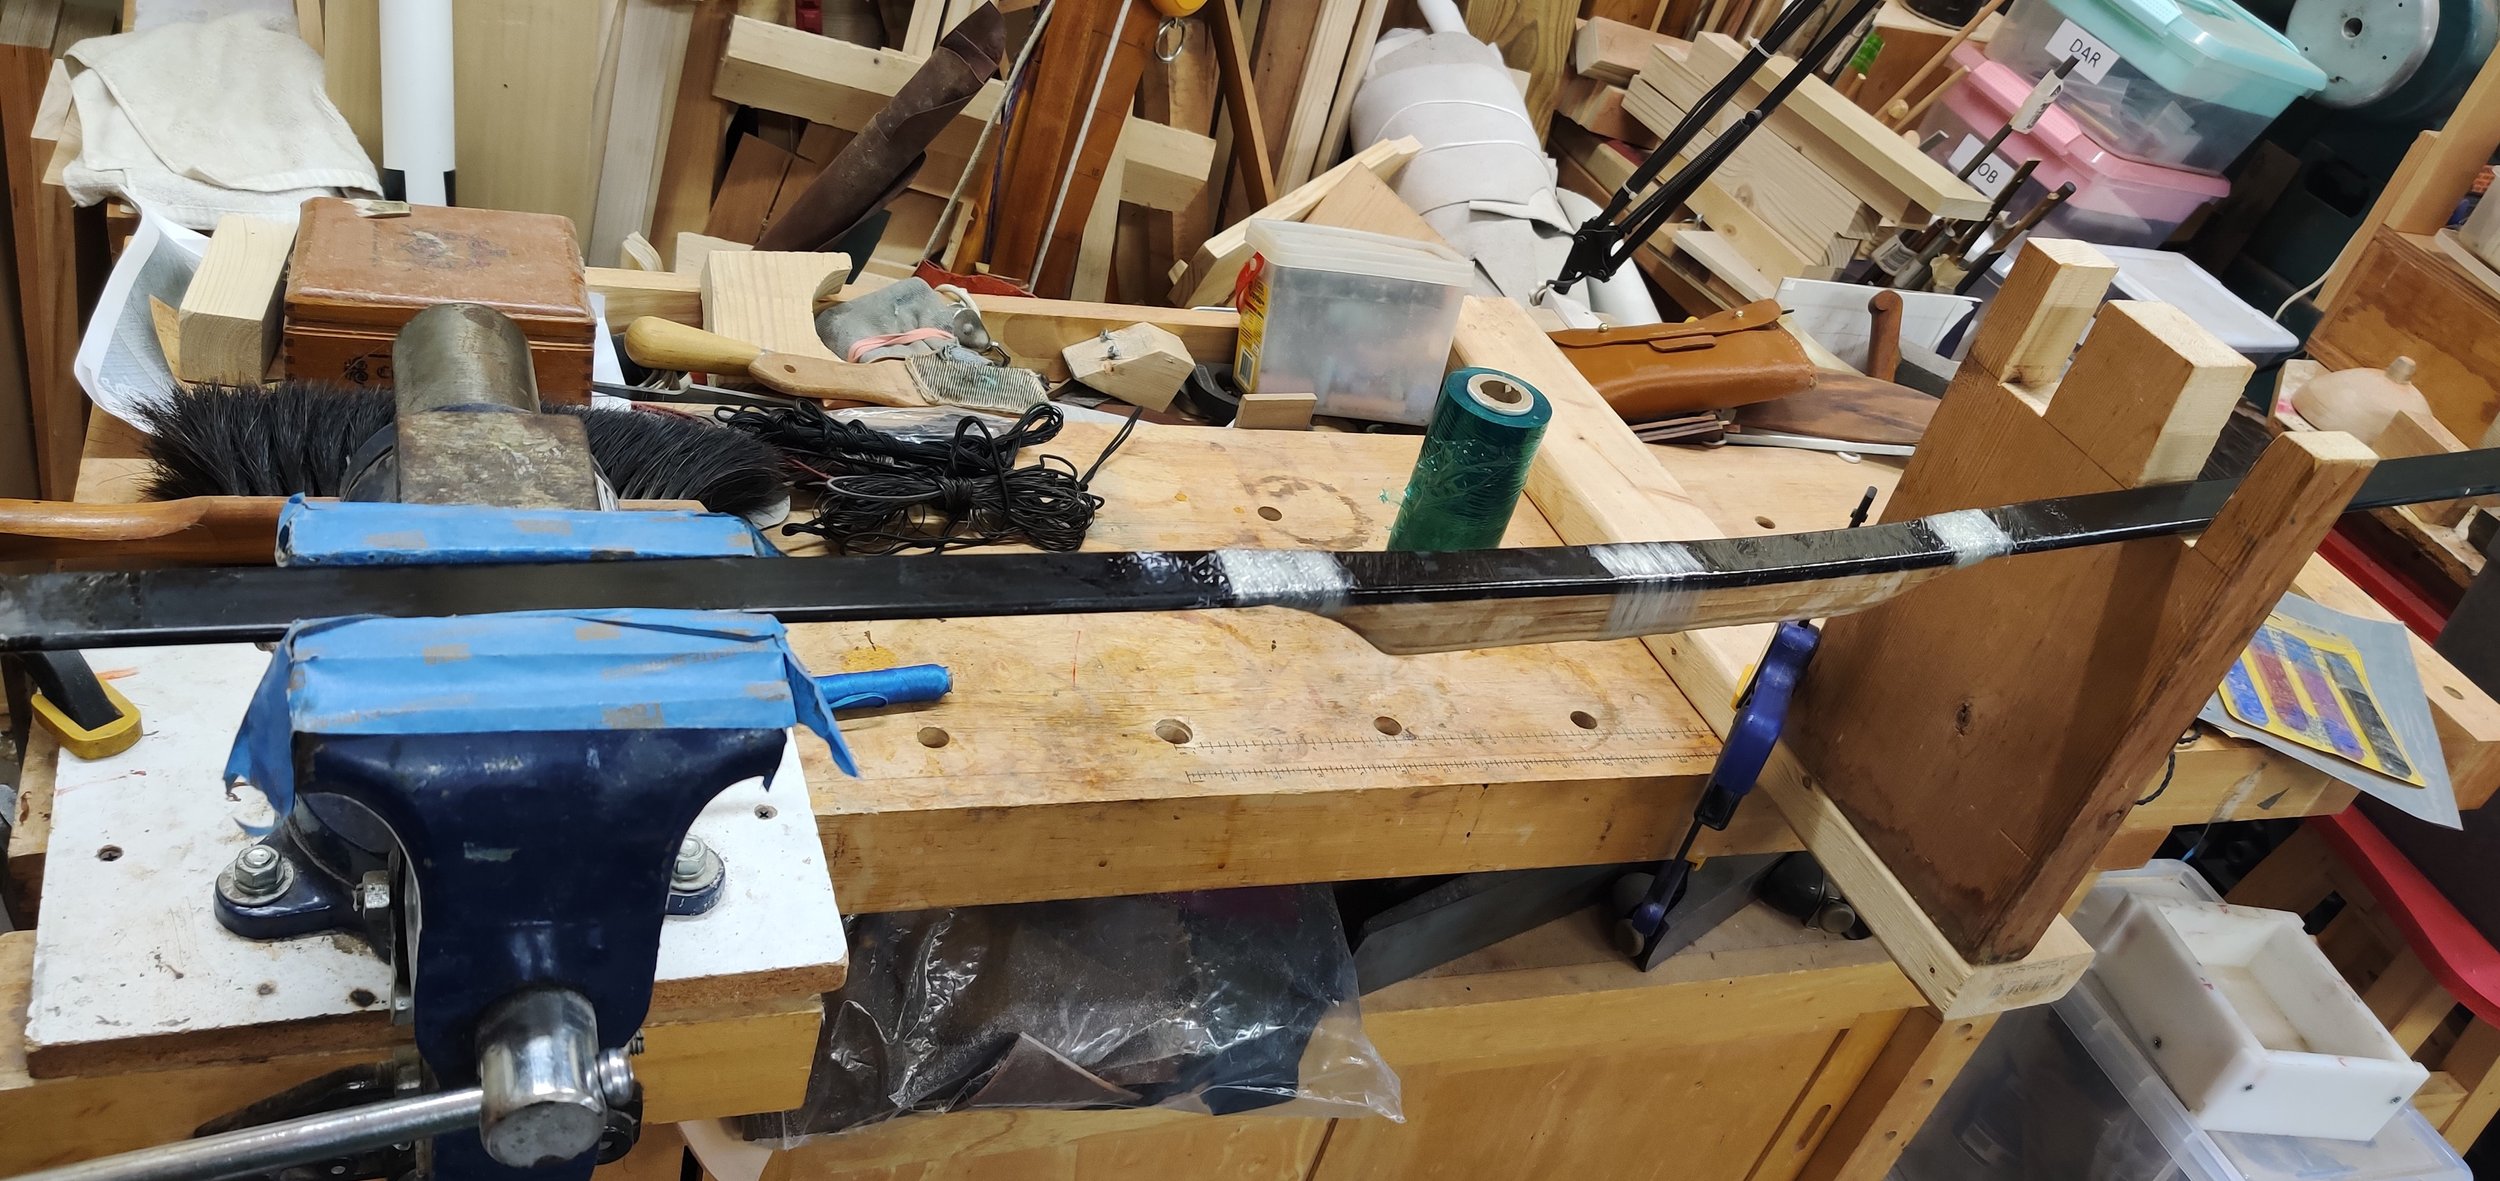
The glue up. The Facso epoxy glue is amazing stuff. https://fascoepoxies.com/Fasco-110-Epoxy-Glue.html

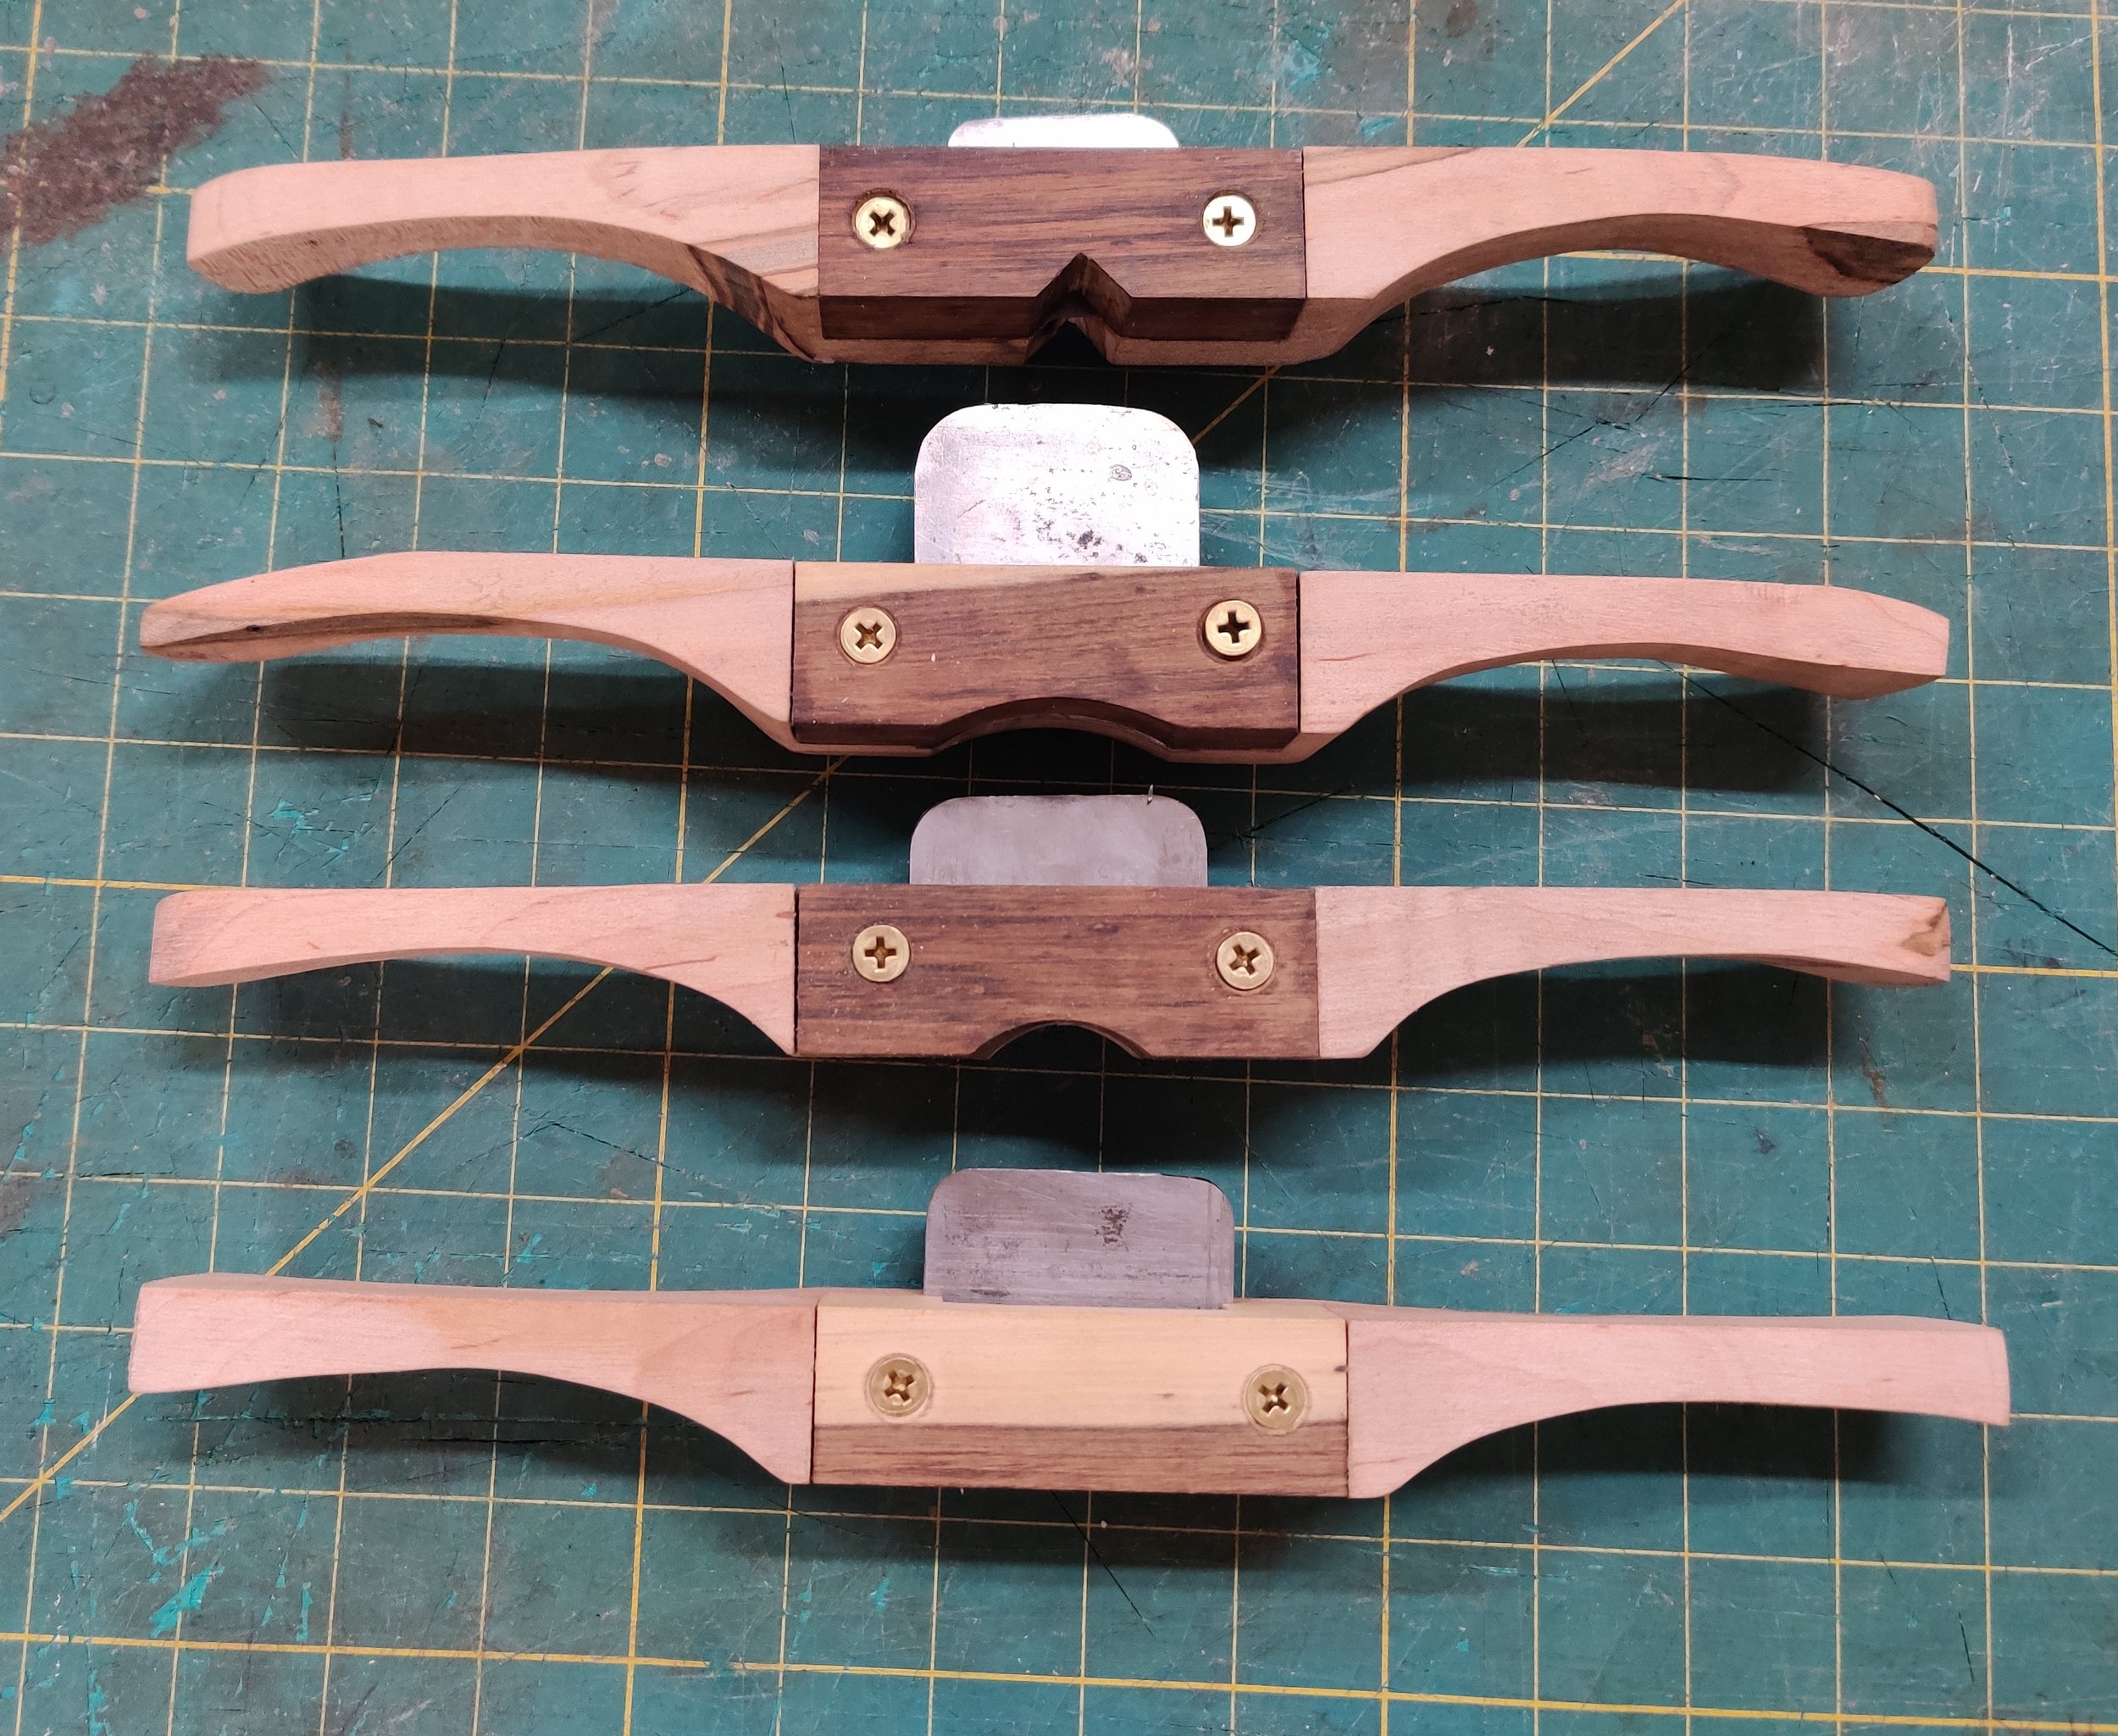
A set of bow makers tools. At the top I have several rasps. You can use any you have at hand. I started with a farriers file from a farm store. I have upgraded over time. The top rasp is by Dean Torges. The three in the middle are pattern makers rasps. Then there is a chain saw file for making string knocks. Below that is a scraper from Dean Torges as well. Then three card scrapers and a piece of buffalo horn for burnishing.

Being a bow maker (bowyer) I have all the hand tools to build bows. Using rasps and scrapers I make a first pass at glue cleanup and shaping of the bow.

The next step mirrors how a traditional horse bow would be built. All the glue up would be reinforced with hide glue in sinew. In this case, the kit provides “super sinew” and epoxy glue.

After the “super sinew” glue up, there is another round of cleanup with hand tools.

Now to start dressing the bow to make it look more “period”. I am going with a blue artificial sinew wrap.

How long should a string be? The normal length of the string is determine by finding the brace. You string the bow with a test string. Then measure from the handle to the string using a thumbs up. This is called a festmele. It is the proper distance for you.

Strung Bow

Festmele

There are two types of bow strings, a Flemish string and an endless string. Horse bows generally us an endless style. This requires a jig. The video is an example build.

One side

Full set up

Time to finish the bow. An arrow rest and handle.

Tine to answer the real question. Does it shoot?

If you do all the work, give yourself some credit. Sign your work!

As a coda on this build, the kit is good quality, the directions a not great, my bows draws 28# at 28 inches. I don’t think it will be 50# at 32 inches. It is nice to shoot and delivers a crisp arrow. I am glad I found the kit.

Wednesday 07.19.23
Posted by James Frank
 

A Love of Hand Tools

Roy Underhill - take a moment and look him up.

When I was starting to build things, it was out of wood. I started stocking a small wood shop in an unfinished basement. There were two shows that taught me more than I can say. Roy Underhill all by hand, the old way and Norm Abrams precision, the new way. I use both but this post is about hand tools.

My shop teacher in Junior High was about learning basic skills. A hand plane, a try square, and a piece of 2x4. Make it true and square. That was a lesson in what can be done by hand.

I make English Longbows and they are precision objects the need fine adjustment. That adjustment is done with scrapers. I purchased many, but I wanted my own. Woodsmith has really great plans so you can make your own. And so I began. I had some sugar maple and some walnut to I roughed out the blanks to dimension and made the inserts.

Next comes cutting the throats for the scraper blades. This was a but of work setting up but take a little care and the come out fine. You can see that they are on an angle to allow shavings to come out.

Using the plans you paste on a guide to bandsaw out all of the blanks to make a profile that fits in the hand. Cutting to a guide requires working out the order of the cuts and saving the cut off pieces to move to the next cut. Take time to work out the order of operations.

After the bandsaw and sanding you something something like this. A visit to the drill press and a countersink and you have the holes for the great brass hardware from McMaster-Carr. I get hardware from them for special projects when you need the brass.

Now I have the holder, but I need the working edge. You can order all sorts of card scrapers, but I had a few on hand that I was ready to cut into pieces. You can scribe them with a file and snap them or cut them with a hacksaw. There are four different scrapers. One to chamfer an edge, a small half round, a large half round, and a flat. If you look below, you can see how the profiles have been sanded in the body of the tool. Then the pieces of scraper also need to be modified with a drum sander or files to match.

Now some sort of a finish (I used a wax) and you have you personal set of scrapers. After use they will get all that patina of well used tools and they will last for as long as your work does.

Of course this whole exercise would not be complete unless they actually do the work intended.

tags: Hand Tools, Scrapers
categories: Woodworking
Wednesday 06.21.23
Posted by James Frank
 

Where to Begin

I am an Accidental Craftsman.

As a kid, I was not much of a builder. The Maker culture was not a thing. I was a Cub Scout and Boy Scout, so there is a bank of skills that comes along with that world. But not what I do today.

As a kid, magicians were all over the TV and I wanted to learn magic. The library was the place. I went through every book the had on magic and juggling. This gave me a base of performance skills that I would use through high school and college. The real change did not happen until I graduated college and got a real job using my degree.

I moved to a place far from home and discovered this thing called a Renaissance Festival. Maryland Renaissance Festival to be exact, and made a visit to the faire. This is where the story begins.

I took the decision to audition, the first two tries were, shall we say, not good. No theme to the magic, no real look, nothing to hire. So it was time to get serious. I could sew. I learned to sew to be close to my girlfriend (Hi Anne). I found a pattern and made an outfit. Tandy leather provided a boot kit for me to make. I studied everything I could find of street performing and renaissance magicians. I made a leather pouch like the pictures I had seen. I was ready!

The audition was held in a busy tourist location. Directly under fire. Could you build a crowd and make them happy? I have been a variety performer ever since that moment. And I have been a maker, building a collection of odd skills. Here I plan to document some of them so others can share the fun.

Monday 06.19.23
Posted by James Frank
 

Powered by Squarespace.